Is your website running on the WordPress platform? Then you should take note of the many WordPress security measures available to protect your website. One of them, by using the Google Authenticator for WordPress plugin.
WordPress is now one of the most widely used platform for websites. Hence. it is now the target of hackers and crackers. Back in April 2013, many thousands of WordPress sites were compromised. Why? Because their owners left their sites unprotected.
Basic WordPress Security
There are many security measures you should take to prevent your WordPress sites from becoming a hacking victim. Among those that you can do straight away on your own easily are the following:
- Create a new Admin User (if you are currently using the default “admin” user)
- Remove the default “admin” user
- Have a complex password
- Install and configure security plugins
There are a number of security plugins that you can install. Right now, I am going to cover about one such plugin. The Google Authenticator for WordPress. This plugin is easy to implement and configure. It also provides a sound protection for your WordPress sites.
You are about to learn how to secure your WordPress website with Google’s 2 Step Verification.
Using Google’s 2 Step Verification To Increase WordPress Security
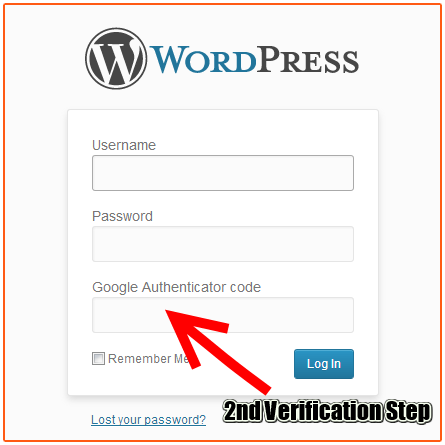
What does Google Authenticator for WordPress do? It secures your WordPress login. It does so by adding another verification field. Once installed and configured, you will need a username, password and a Google key to login into your admin dashboard. This is called a 2-Step verification process. This way, even if your username and password have been compromised, your wordpress admin area is still secured. The 2 Step Verification key is only available in your smartphone or computer. The key also changes by the minute.
It’s kind of similar to how banks protects your online transactions. A second form of verification is required in order for you to complete an online transaction. You normally need to enter a verification code. The code is either sent to you via SMS or provided by a token device.
Getting Google Authenticator for WordPress Code in Your SmartPhone
You can use a smartphone to run the Google Authenticator App. That is where you are going to get your second verification code from. By doing so, the bad guys will need your username, password and your smartphone to enter into your WordPress website.
So, lets configure the Google Authenticator for WordPress plugin on your WordPress site.
There is one thing you need to do before you install and configure Google Authenticator. You must sync your phone’s date and time with your WordPress server’s date and time. If they are not synced, you will not be able to login. The verification code is only valid for a very short period. It defaults to one minute. If the time difference is more than a minute, your key would have already expired when you key it in.
You can get your server’s date and time from your Admin Backend under Settings > General as shown below.

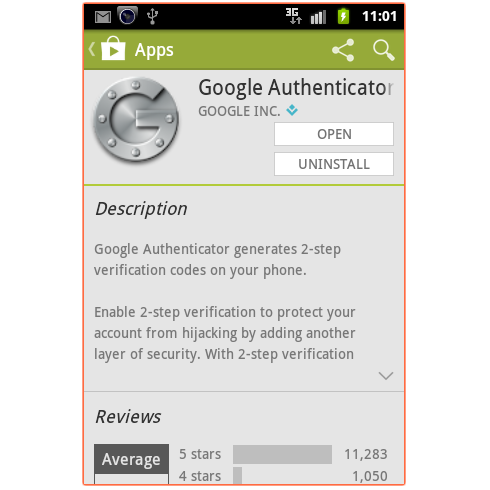
Just make sure that your smartphone’s date and time is in-synced to the date and time shown by your server. Once that’s done, you can now install Google Authenticator App into your smartphone. You can find the app in your phone’s respective market place. For Android phones, head on over to the Play Store. In the Play Store, search for Google Authenticator from Google and install it into your phone.
The Google Authenticator for WordPress Plugin
Next, you can now continue to install and configure Google Authenticator plugin into your WordPress website. To install the plugin, you can download Google Authenticator from the WordPress Plugin Directory. Of course, you can install it directly from your WordPress Admin Backend as shown in the following image.

Install and activate the plugin as you normally would. Once it is activated, you will then need to configure it before it will work with your login id.
Google Authentication works at the user level. Each user in your website can enable or disable Google’s 2 step verification as they wish. You should enable it for your administrative users. Edit the user profile of your users to activate and configure the 2 step verification.

- Active – Check this if you want to enable Google Authenticator to provide 2 Step Verification on your account when you login.
- Relaxed Mode – This will set the expiry time of your verification code to 4 minutes instead of just 1 minute. Change this ONLY if you have difficulty entering the verification code within one minute.
- Description – This is the Name of your app as seen in your smartphone. Avoid using spaces in the name. Best to use your website domain if you have many sites.
- Secret – the key that you need to enter into your smartphone app if you choose to “Manually add an account” in your phone. If you prefer to use the QR Code. Scan the QR Code provided with your smartphone (you’ll need to install a QR Code Scanner into your phone if you don’t have one). It will create your account automatically.
Don’t forget to “Save” your User Profile to ensure that your settings are stored.
You have now configured Google Authenticator in your WordPress and your smartphone. From now on, you will need to enter a second verification code when you login into your WordPress Admin backend. Hence, your WordPress website is now a little bit more difficult to be broken into.
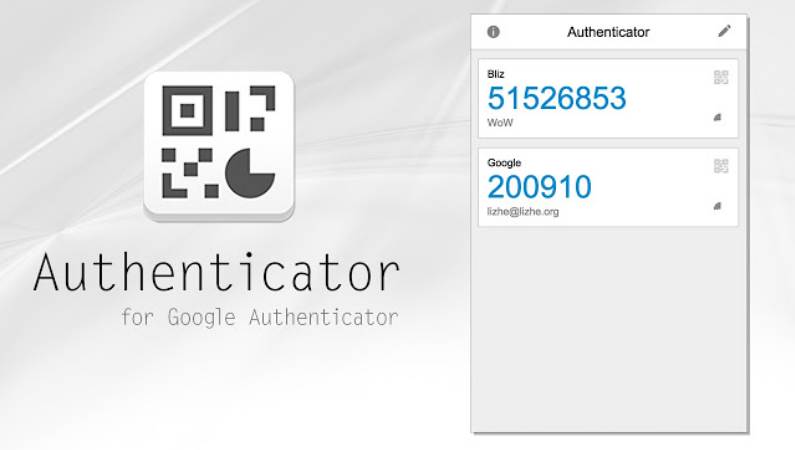
Update April 8th 2014: A GAuth App On The Desktop
There will be times when you want to login into your Google Authenticator protected blog but don’t have your phone with you. I’ve had these moments too.
Makes you want to disable the plugin right?
Don’t. It’s a fairly good first line of security for your blog.
Instead, you should install the Desktop Version of Google Authenticator client. It’s a Firefox app that can be found in the FireFox Marketplace.

With this available on your desktop, you no longer need your phone to generate the Google Authenticator Code to login into your protected WordPress site.
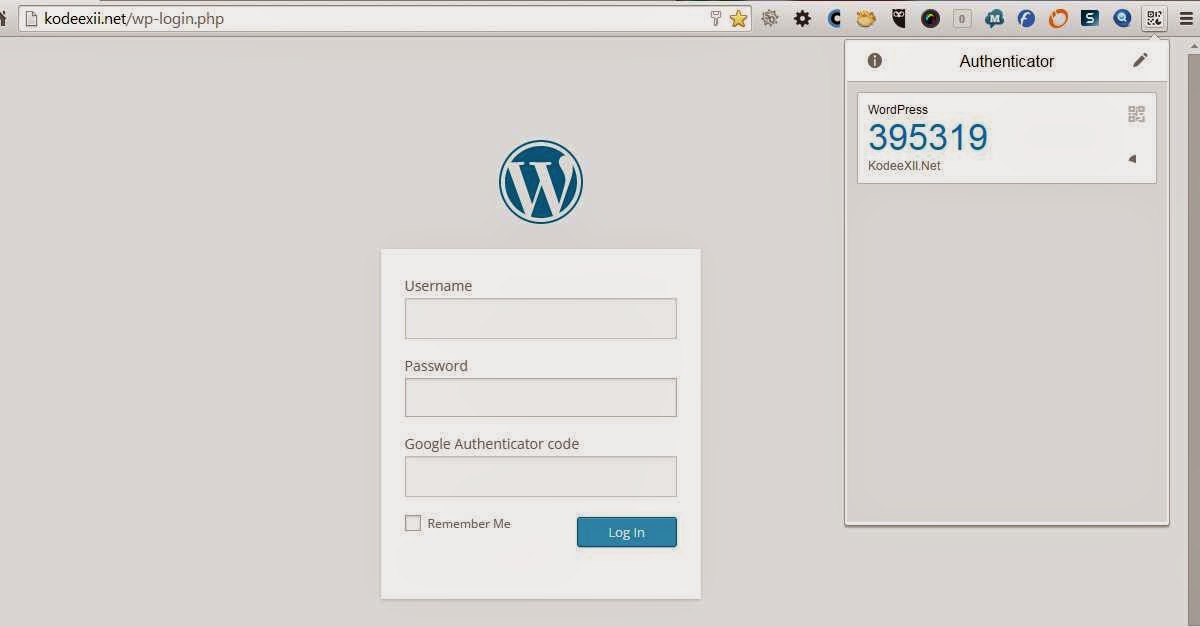
Update November 16th, 2014 – Google Authenticator Chrome Extension
Nowadays, many browse the web using Google Chrome. Thus it is only fitting that I add the Google Authenticator App for Google Chrome in here too. You can get the Gauth App from the Chrome Web Store.
Once installed, you can then access it via the Authenticator icon at the top of your Chrome Browser.

It will take you just a couple of minutes to set it up for your GAuth protected sites. You will then be able to get your GAuth code without having to leave your Google Chrome Browser. Nice 😀
Do you think using Google’s 2 Step Verification is a good WordPress Security measure? What other types of security measures have you taken to protect your WordPress website? Care to share them with me?